Better Bites

My experiments in healthy eating, cooking, and living

Archive for the category “Dessert”

Chocolate-Flavored Creamy Avocado and Raspberry Pudding

Avocado pudding 1

Avocados just keep getting better. This fruit can be used in appetizers, dinners, salads, and soups. I wasn’t sure I could believe it until I tried it, but avocados can even be used in desserts.

This pudding is simple to make, tastes richer than it is, and is technically a dessert made almost entirely of fruit. Can you go wrong? I don’t think so! There shouldn’t be anything stopping you from making this recipe, as it really only has a few ingredients. My roommate even raved about the pudding  (if you needed another reason to be convinced to try it). So get your kitchen gadgets ready and rush to the kitchen in three-two-one. Go! You won’t regret it, unless you are one of those people who isn’t really fond of desserts (though I haven’t met many people that don’t enjoy dessert).

Avocado pudding 2

Chocolate-Flavored Creamy Avocado and Raspberry Pudding:

*Recipe inspired by an avocado pudding recipe found on This Chick Cooks

*Serves two

Ingredients: 

1 cup of raspberries, frozen or fresh, rinsed and patted dry

2 tbsp of water

2 tsp of agave nectar

1 avocado, halved and diced

3 tbsp of cocoa powder

3 tbsp of maple syrup

1 tsp of vanilla extract

3 tbsp of nut milk or the milk of your choice (or more if you’d like the pudding to be thinner)

Method:

Add the raspberries, water, and agave nectar to a pot set over medium low heat. Heat the raspberries until they easily break apart. Mash them until they become smooth, as they would if you’d pureed them. Set the raspberry spread aside and allow it to cool.

While you’re waiting for the raspberries to cool, add the rest of the ingredients to a food processor or high speed blender. Set it to high and let the ingredients combine. After a minute or so, scrape the sides of the food processor and then put the lid on and put it back on high. Do this until the mixture is smooth and creamy.

Chill both the raspberry puree and the avocado pudding before serving. To serve, layer the avocado pudding and the raspberry puree in the serving dish or glass of your choice (I found it easiest to scoop the mixture into a glass using a small spoon). Top with a fresh raspberry and enjoy!

Raved About Healthy Blueberry Scones Made with Spelt Flour

Blueberry scones 1

After reading the title, you already know these blueberry scones have been raved about. I made them twice in one weekend when I went up to Boston with my family and they promptly disappeared after being removed from the oven. I was also asked for the recipe multiple times. If you make them once you are bound to be asked to make them again (and again).

This recipe produces light, fluffy scones that you don’t need to feel bad about eating. With only 1/3 of a cup of oil and 1/3 of a cup of agave nectar per recipe these are fairly guilt-free. The whole spelt flour produces a lighter scone than white or all purpose flour would and unlike wheat flour these scones don’t have the heartiness or the taste of being a whole grain (which I find as a plus when it comes to baked goods). They are also incredibly moist and a few anti-scone family members even enjoyed them (and came back for seconds). My dad (a tough critic in the kitchen) even said they were the best scones, which I consider a huge accolade coming from him. The word “best,” is uttered very sparingly by him.

I found the recipe on Shannon’s amazing blog (which you should check out if you haven’t – it’s full of wonderful recipes, musings on running, book reviews, and more), Move Eat Create, and only made a couple of changes. I used vegan buttery spread by Earth Balance instead of using hazlenut or coconut oil, which I found to produce a more flavorful and lighter scone (as I have used coconut oil in making these scones in the past, but I can’t speak to using hazlenut oil, as I haven’t used it). I also used fresh blueberries, which I felt made all the difference in the world. They just added this little pop of sweetness, as they are now in peak season in New England. Read on for the slightly altered recipe below.

Blueberry scones 2

Healthy Blueberry Spelt Flour Scones: 

*Recipe from Shannon’s blog titled Move Eat Create (find the link to the recipe in the paragraph above)

*Makes about 9-10 scones

Ingredients:

2 cups whole spelt flour

1 tbsp baking powder

1/2 tsp of fine grain sea salt

1/3 cup of Earth Balance buttery spread, melted (sub with butter if you aren’t trying to make them vegan, and if you want to be a bit healthier but still not have them be vegan, you can use 1/6 cup melted butter 1/6 cup vegetable oil combination)

1/3 cup of light agave nectar

1 tbsp vanilla extract

1/4 cup hot water

3/4 fresh blueberries

Method: 

1- Preheat the oven to 350 degrees.

2- Meanwhile, mix the dry ingredients and stir with a whisk to ensure they are well combined.

3- Then, after melting the 1/3 cup of buttery spread, combine the melted buttery spread, agave nectar, and vanilla extract. Stir once and then pour over the spelt mixture. Gently mix together.

4- Add the hot water and again gently mix until it’s combined (try not to over mix spelt flour).

5- Gently fold the fresh blueberries into the batter. Use a 1/4 cup measure to spoon batter onto a parchment-lined baking sheet (to ensure that the scones will be the same size). Bake the scones for 15-20 minutes or until they are golden brown on top. These kept well in an air tight container for 3-4 days. I stored mine in the fridge and heated them in the microwave or toaster before eating.

If you missed my other scone recipes here are the links for my raspberry chocolate chip spelt flour scones and my ginger peach spelt flour scones. Enjoy!

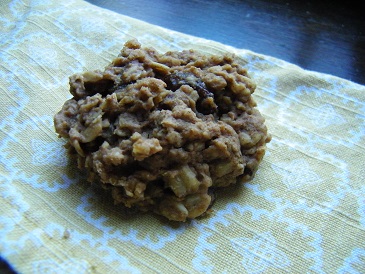
Vegan and Gluten-Free Oatmeal Raisin Cookies

Oatmeal Raisin Cookies

I’ve had a thing for raisins lately. I just can’t get enough of them. Since I’ve practically been dreaming of the “perfect” oatmeal cookie, it was no surprise that I whipped these up last night. These came pretty close to being “perfect.” They were moist, sweet, and melted in my mouth. I made them yesterday and a little more than half of them have already disappeared. I’ve been one very happy oatmeal cookie-loving  lady.

Vegan Oatmeal Raisin Cookies:

*Makes about 10 cookies

Ingredients:

1/2 cup of gluten-free oat flour (or if you don’t have oat flour whole wheat pastry flour might work also)

1/2 cup of rolled oats (for a crispier cookie that is less moist, add more oats)

1/2 cup of quick oats

1 tsp of baking powder

1/4  tsp of sea salt

1 tsp of cinnamon

1/3 cup of raisins

1/3 cup of chopped walnuts

1/4 a cup of sucanat (I used the Wholesome Sweeteners brand, though I’m sure you could use regular brown sugar or turbinado sugar)

1/4 of a cup of vegan butter spread, packed in the measuring cup and then melted

1/2 cup of applesauce

1 tsp of vanilla extract

Method: 

1- Preheat the oven to 350 degrees. Then whisk the flour, oats, raisins, walnuts, baking powder, cinnamon, and salt together.

2- In a separate bowl, combine the rest of the ingredients (the vegan butter, applesauce, vanilla, and sugar). Mix the wet ingredients.

4- Add the wet ingredients to the dry. Make sure you stir the batter enough so all of the oats are coated by the wet ingredients. Note that the batter will be very moist.

5- Line a baking sheet with parchment paper.

5- On a lined baking sheet, drop cookies onto a baking sheet using a tablespoon. You may have to form them a bit just to make sure that all of the cookie stays together (as the batter crumbles easily before baking).

6- Bake for about 10 minutes (depending on your oven). When they are finished the bottom should be a golden brown color.

7- Let the cookies sit on the baking sheet for about five minutes and then move them over to a cooling rack for five minutes or so. Note that the cookies are fragile when they immediately come out of the oven, so be gentle when taking them off of the cookie sheet.

In case you missed my recipe for oatmeal chocolate chip cookies, find it here!

Raspberry Chocolate Chip Scones

Raspberry chocolate chip scones

Lately, I’ve undergone some major life changes, which have made writing seem difficult. It’s almost like these changes have created writer’s block. I almost wasn’t going to write this post, but then I watched a video of Neil Gaiman giving a speech at a commencement ceremony, which was posted on Change For a Year. It was then that I knew I couldn’t just stop writing even though the writing wasn’t coming and it wasn’t going to be the best writing. Sometimes you just have to keep going or as Neil Gaiman said “Make good art. Make it on the bays days. Make it on the good days too. And fifthly while you’re at it, make your art…The urge starting out is to copy and that’s not a bad thing. Most of us only find our own voices after we’ve sounded like a lot of other people. The one thing you have that nobody else has is you, your voice, your mind, your story, your vision. So write and draw and build and play and dance and live as only you can.”

While this scone recipe is not completely my own, we all have to start somewhere. Someday I aspire to create my own scone recipes, but for now I’ll adapt the recipes of others until I get to that point.

Raspberry Chocolate Chip Scones: 

*Adapted from Shannon’s recipe for delicious blueberry scones found on her blog Move Eat Create (mine are also nearly identical to a Babycakes recipe – I think the only difference from mine and the Babycakes’ recipe is the chocolate chips)

Ingredients: 

*Makes 11 scones

2 cups whole spelt flour

1 tbsp baking powder

1/2 tsp of fine grain sea salt

1/3 cup of coconut oil, melted OR use Earth Balance’s Buttery Spread, melted (UPDATE: using the buttery spread produces a lighter and more flavorful scone than using coconut oil, as I recently found when making them again)

1/3 cup of light agave nectar

1 tbsp vanilla extract

1/4 cup hot water

3/4 cup frozen or fresh raspberries

1/4 cup vegan chocolate chips

Method:

1- Preheat the oven to 350 degrees.

2- Meanwhile, mix the dry ingredients and stir with a whisk to ensure they are well combined.

3- Then, after melting the 1/3 cup of coconut oil, combine the coconut oil, agave nectar, and vanilla extract. Stir once and then pour over the spelt mixture. Gently mix together.

4- Add the hot water and again gently mix until it’s combined (try not to over mix spelt flour).

5- Fold the chocolate chips and the raspberries into the batter. Use a 1/4 cup measure to spoon batter onto a parchment-lined baking sheet (to ensure that the scones will be the same size). Bake the scones for 15-20 minutes or until they are golden brown on top. These kept well in an air tight container for 3-4 days. I stored mine in the fridge and heated them in the microwave before eating. They taste great with fresh raspberry jam, if you have any on hand.

*If you missed my version of ginger peach scones, find the recipe here.

Vegan Coconut Macaroons In Four Flavors and the Thanksgiving of Ten Desserts

 Coconut macaroons 2 Coconut macaroons 3 Coconut macaroons 1

 About two Thanksgivings ago I ate ten desserts in that one day. Yes, I admit it. It happened and I certainly didn’t feel good afterwards, but the eating part was so wonderful I just couldn’t stop myself. I shoved my mouth full of my grandma’s ricotta cheesecake, pumpkin and apple pies, as well as many different types of cookies and cake. Now, I know that ten sounds like a lot, but I’m a grazer by nature. I like to nibble on lots of different types of foods. It wasn’t like I just plowed through ten full size desserts, though I must admit, that would be impressive. Really, what led me to eating my plateful(s) of mini-sized desserts and what also let me to bake four versions of coconut macaroons is my indecisiveness.

Who could make just one version? Certainly not me. Nope, I needed to make four and I’m sure I ate nearly half of them myself. I mean when you bring these things to a function (and they’re the only dessert there you can eat), you’re going to devour a bunch of them just because of how delicious they are. These macaroons hit the spot (all four versions). They were lightly crunchy on the outside and oh so moist on the inside. The citrus macaroons were refreshing, while on the other hand, the chocolate and chocolate chip ones were decadent. You choose or don’t and make multiple types of macaroons like I did (I certainly didn’t regret it, especially since these aren’t all that bad for you).

Coconut macaroons 4

Coconut macaroons:

*Adapted from the Coconut Macaroon Thumbprint Recipe found on Oh She Glows

*Makes 16-18 macaroons

Ingredients for citrus macaroons:

1 1/2 cups unsweetened finely shredded coconut

1 cup of almond flour/meal

1/4- 1/2 tsp of fine sea salt

1/2 cup maple syrup

1/4 cup of coconut butter, melted (I used Earth Balance Coconut Spread) *this is not the same as coconut oil

1/2 lemon juiced or 1 lime juiced (depending on the flavor you want)

zest of 1 lemon or lime, depending on the flavor you choose

Ingredients for chocolate and chocolate chip macaroons: 

1 1/2 cups unsweetened finely shredded coconut

1 cup of almond flour/meal

1/4- 1/2 tsp of fine sea salt

1/2 cup maple syrup

1/4 cup of coconut butter, melted (I used Earth Balance Coconut Spread) *this is not the same as coconut oil

1 tsp of vanilla extract

2 tbsp of mini chocolate chips or regular chocolate chips, chopped

*for the chocolate version add 4 tbsp of cocoa powder and 1 tbsp extra of maple syrup and top with cacao nibs (optional)

Method (same for all recipes): 

1- Preheat the oven to 275 degrees and cover a cookie sheet with parchment paper. Then combine the dry ingredients in a bowl. Whisk them together. Then add in the syrup, the melted coconut oil, and any citrus juice or vanilla extract. Mix well. *If you are creating the chocolate version – add the extra maple syrup and the cocoa powder now.

2- Fold in the chocolate chips if creating the chocolate or chocolate chip macaroons. Then use a medium sized-melon baller to create even sized macaroons. Space them evenly apart on the cookie sheet (they don’t need too much room in between because they don’t spread at all).

3- Bake them for 20-22 minutes. They should be slightly crisp on the outside when you pull them out. Let them cool completely before serving (though I’m sure they would taste good warm too). Top the citrus macaroons each with a pinch of fresh zest.

These were delicious. I wouldn’t have made them if there wasn’t a special occasion because otherwise I would have eaten them all on my own. They were that good.

Ginger Peach Scones

Ginger peach scones

My love for scones came rather late in life. I have to admit that I only really began to enjoy them about two summers ago. Oh how I’ve missed out on these delicious baked goods. These ginger peach scones were just delicious- they were light, filled with flavor, and slightly moist. In short, they were everything a scone should be. No hockey pucks here. Just a tasty baked treat. As Shannon from Move Eat Create said, they make wonderful comfort food. I made them and then promptly ate two as soon as they came out of the oven. They were that irresistible   I had to start making up for all those scones I’ve missed out on eating over the years.

Almost ready for the oven!

Almost ready for the oven!

Ginger Peach Scones: 

*Adapted from Shannon’s recipe for delicious blueberry scones found on her blog Move Eat Create (originally adapted from a Babycakes recipe)

Ingredients: 

*Makes 9 scones

1 1/2 tsp of coconut oil (for sauteing the peaches)

1 1/2 cups of fresh or frozen peach slices

1 1/2 tsp of coconut sugar (or something similar to brown sugar)

1 tsp of freshly grated ginger (for the peaches)

2 cups whole spelt flour

1 tbsp baking powder

1/2 tsp of fine grain sea salt

1/3 cup of coconut oil, melted

1/3 cup of light agave nectar

1 tsp freshly grated ginger

1 tbsp vanilla extract

1/4 cup hot water

Method: 

1- Preheat the oven to 350 degrees. Then heat the one and a half teaspoons of coconut oil in a frying pan over medium heat. When its melted, add the peach slices. Turn them to allow for even cooking and to make sure both sides defrost evenly (if they are frozen). Allow the peaches to cook until they begin to soften (about 5 minutes). Then add the coconut sugar and the ginger. Stir and allow the mixture to cook for about 1-2 more minutes. Then take the peaches off the heat and allow them to cool.

2- Meanwhile, mix the dry ingredients and stir with a whisk to ensure they are well combined.

3- Then, after melting the 1/3 cup of coconut oil, combine the coconut oil, agave nectar, ginger, and vanilla extract. Stir once and then pour over the spelt mixture. Gently mix together.

4- Add the hot water and again gently mix until it’s combined (try not to over mix spelt flour).

5- Cut the peach slices into 1/2 inch chunks and fold them into the batter. Use a 1/4 cup measure to spoon batter onto a parchment-lined baking sheet (to ensure that the scones will be the same size). Bake the scones for 15-20 minutes or until they are golden brown on top. (If you had any juice left from sauteing the peaches, drizzle it over top of the scones). These kept well in an air tight container for 3-4 days. I stored mine in the fridge and heated them in the microwave before eating.

Ginger peach scones 3

My love for scones lives on. Especially when they are as light and fluffy as these. Feel free to post any of your favorite scone recipes and flavor combinations!

Cinnamon Raisin Popcorn (and possibly my new food addiction)

Cinnemon Raisin Popcorn

If patience isn’t a quality you pride yourself on having, then making popcorn the old-fashioned way may not be for you. I’ve always been one of those antsy people waiting in line, only wanting to be out of line. I’m also guilty of being a slightly worse version of myself when hunger creeps up on me and there are no snacks in sight.

As you can imagine, when I was waiting for this popcorn to pop, it  felt like I was a kid waiting for summer vacation to arrive a few days before school ended. All I wanted to do was somehow help the popcorn along to start that magical popping process.

Instead, I just waited. Let me tell you, while you are waiting for your popcorn to pop you can get a lot done. This is the upside of it taking a while for the popcorn to begin popping in the first place. You can wash your dishes, make your bed, work out your abs, or possibly even look up the science behind why popcorn pops (believe it or not there is water in that little kernel). I will admit to washing the dishes, but I didn’t look up how popcorn pops or workout my abs (mainly because that is my least favorite area to workout). I didn’t have that much time. Maybe next time.

In any event, all that waiting was so worth it. This cinnamon raisin popcorn was lightly buttery with undertones of cinnamon. Sugar-coated raisins peeked out through the pieces of popcorn. It was so good, I may even go make more now.

Cinnamon Raisin Popcorn: 

*Makes about 3 cups of popcorn (which is enough for 2 if you’re willing to share)

Ingredients: 

1 tsp of virgin coconut oil (refined will work too)

1/8 cup of popcorn kernels

2 tsp of imitation butter spread, melted (I used Earth Balance coconut spread)

2 tsp of pure maple syrup

1/4 tsp of cinnamon

1/8 – 1/4 cup of raisins

Method:

1- Add the coconut oil to a frying pan. Put one kernel of corn in the pan when the coconut oil melts. Then put the top on and the waiting game begins. When the kernel finally pops add the rest of the kernels in and shake the pan back and forth while the other kernels start popping. Take it off the heat as soon as you stop hearing the kernels pop.

2- Melt the imitation butter and then add the cinnamon, sugar, and raisins to it. Mix well and then pour the sugar-raisin combination on top of the popcorn and toss until all of the kernels have been coated. The raisins will want to sink to the bottom, so make sure to sprinkle them on top.

You will not regret making this popcorn dessert/snack, unless you’ve become addicted to eating it, like me. In case you missed my other post on almond joy popcorn, find it here. Another delicious choice. What is your favorite way to season popcorn?

Simple Blueberry-Apple Cobbler

apple cobbler 2

Who can resist pie? Certainly not me. Of course, I say this as I wait for my blueberry apple crisp to finish baking. I smell the aromas of cinnamon and apple making their way through the kitchen. Based on scent alone, this cobbler already promises to please the taste buds.

Yes, I know cobbler isn’t the same as pie. I like to think of cobbler as pie’s easy-going sibling. There is no need to take out the rolling pin, obsess about whether the pie crust is flaky enough, or ponder how you should cover the pie. Cobbler is almost always a sure thing and for someone who is indecisive, cobbler removes the many questions that pie invites.

Now, I know some of you are probably die-hard pie fans. You’re probably thinking, “Why did she go and screw up an all-American apple pie by adding blueberries and an oatmeal-crisp topping?” Simply put, it delivered delicious results. Sometimes even an old favorite needs a new spin.

Which do you prefer to make and eat, pie or cobbler?  I vote cobbler and yes, I did just finish eating my portion before I submitting this post. Obviously, I have my priorities in order. Read on for the recipe.

apple cobbler 1

The fruit that inspired this tasty dessert.

Ingredients for Simple Blueberry-Apple Cobbler: 

*Serves 2 / Preheat the oven to 350 degrees

Filling:

2 apples (I used Macintosh), diced into 1/4 inch pieces

1 tsp + 1/2 tsp of sucanat (sub organic brown sugar or maple syrup if you don’t have sucanat, which is similar to brown sugar, but less processed)

1/4 to 1/2 tsp of cinnamon (depending on your preference for the spice, I always like more so I used 1/2 tsp)

4 tbsp of organic blueberries (fresh or frozen)

Topping: 

1/4 cup of rolled oats

1/4 cup of nuts (walnuts, almonds, or pecans), chopped (I used equal parts walnuts and almonds, but for a buttery flavor use pecans. My topping tasted a bit nutty, instead of buttery.)

1/4 tsp of cinnamon

1 tbsp of pure maple syrup

Method: 

1- Preheat the oven to 350 degrees. Dice the apples, then add then add them to a small mixing bowl. Add the teaspoon of sucanat and the cinnamon and stir. Divide the mixture evenly between two small baking ramekins (mine were about 4 inches in diameter), or if you don’t have ramekins you can use a loaf pan.

2- In the same bowl (after portioning out the apple mixture), mix the blueberries with the half teaspoon of sucanat. Add those to the ramekins by spooning the sweetened berries atop the apples.

3- Add all of the ingredients for the topping into the same small mixing bowl. Mix well and then spoon onto the top of the blueberries. Bake for 20 minutes, or until the crust becomes golden brown and the apples become soft. Let the cobbler cool for about 5 minutes before serving. Easy, delicious, and fairly healthy.

apple cobbler 3

Ready to go into the oven!

Frozen Chocolate Covered Banana Bites

banana bites

A chocolate and nut butter fudge-like coating covered the frozen banana slices, which I topped with slightly bitter cacao nibs. These weren’t overly sweet, as the mister pointed out. He was hoping for something that reminded him of a candy bar like taste. If you’re looking for that added sweetness I would add more sweetener as needed and taste as you go. For me, the sweetness was perfect. As I bit into my chocolate covered banana slice, it seemed like I was eating a creamy banana popsicle coated with fudge. I’ll take it as an after dinner snack any day! Read on for the recipe!

Ingredients for chocolate banana bites: 
 *Makes about 20-25+ banana bites
3 ripe bananas, sliced 1/2 inch thick (feel free to use another banana if you have extra chocolate coating leftover)
1/2 cup of almond butter
 1/4 cup of cocoa powder
 1/4 cup of coconut sugar
 1 tbsp of virgin coconut oil, melted
 1 tbsp of agave nectar
 2-3 tbsp almond milk (or the milk of your choice) *amount depends on the consistency of the chocolate mixture, if it is too thick to cover and coat the banana slices then add the extra tablespoon of almond milk to thin it out
 1 tbsp of cacao nibs for sprinkling (sub mini chocolate chips if you don’t have cacao pieces)
Method: 
1- Cover a baking sheet with parchment paper. Then, slice your bananas and set them off to the side.
2- Add the almond butter, cocoa powder, coconut sugar, coconut oil, and agave nectar to a bowl. Mix together. At this point, the nut butter mixture will be very thick. Add one tablespoon of almond milk at a time until the batter reaches a consistency, which will allow you to coat the banana slices. I added three tablespoons of almond milk and the consistency of the chocolate mixture was similar to that of brownie batter, but a little thicker.
3- Either add all of the banana slices to the batter and stir them up and take them out one at a time with a fork OR you can place them in the batter and coat them one at a time (pulling them out with a fork). I tried both techniques. The first was a bit faster.
4- Top with cacao nibs and freeze for 1.5 hours (they are still great after a day+ in the freezer, just don’t let them sit out too long). *NOTE: Don’t let these sit out too long or they will become melted and soft.
These would be perfect as a sweet after dinner dessert or to take to a family picnic as the weather gets warmer. Let me know what you think!

Almond Joy Flavored Popcorn

almond joy popcorn


Sometimes I need a little evening pick me up. This almond joy inspired popcorn is a fairly healthy recipe that does just that. This light light as air snack is hardly over the top, as the popcorn recipe produces subtle flavors of coconut and chocolate. Which foods do you look to when you crave a healthy treat?

Ingredients for almond joy popcorn:
*Yields about 3 cups of popcorn
1 tbsp of virgin coconut oil, melted
1/8 of a cup of popcorn kernels
1 tsp of coconut butter, melted (I used Earth Balance’s coconut spread)
1 1/2 tsp of coconut sugar
1 tbsp of melted vegan dark chocolate
1 tbsp of cacao nibs
1/8 cup of slivered almonds
Method: 
1- Melt the coconut oil in a large frying pan or sauce pan. When the coconut oil is melted add 2-3 kernels to the pan.
2- When the kernels begin to pop, add the rest of the kernels. Keep the pan moving as the popcorn pops.
3- When the corn is done popping, take it off the heat. Pour it into a medium sized bowl and pour over the melted coconut butter. Then sprinkle the coconut sugar on the popcorn and stir.
4- Drizzle the melted chocolate on and spread the slivered almonds and cacao nibs over the top. Then stir once more and serve.
In case you missed my post on the raw almond joy bars I made, which were created by rawmazing, here is the link!


Post Navigation

Eat Fit to Live

Healthy Living the Mediterranean Way

whole food runner

Long time runner, recent vegetarian, forever chocoholic

Eat,live,burp

Tried and tasted recipes from my kitchen to yours

Healthy H'ohm'e

Natural health and wellness with a HUGE passion for food

Saucy Pans

Food Reviews and Recipes around Bristol & Cardiff

liveng proof

to inspire a fit & healthy lifestyle

Fiesta Friday

Food + Friends = Fun

ninjamonkeyguk

A fine WordPress.com site

Sugarfree Sweetheart

an illustrated diabetic-friendly food blog

crazyrawlife

life, raw: unprepared or imperfectly prepared for use... not in a polished, finished, or processed form. global adventures.nourishing practices xx

Buckwheat for your health

Learn more about this superfood - Buckwheat!

My little jar of spices

Putting the delicious in healthy eating: gluten-free and paleo inspired recipes

Safe Eats

Educating, Cooking and Baking - To Include Everyone